

As much as I love having one blog all about kids, I just don't seem to have the time to maintain 2 blogs. So I'm going back to one Blog. The blog will be a combination of home crafting and kids. So come see me at Fancy That.
Have a delightful day!
Friday, February 20, 2009
Find Me At Fancy That
Tuesday, February 17, 2009
Coffee Filter Fun and an Art Gallery
In my last post we were making paper for Valentine decorations. Well Valentines Day came and went and we still had not gotten to our decorating. So we changed directions and went for another sort of decoration. I know it's not Spring yet, but it's oh so close and I just wanted something light to brighten our day! So we made these decorations for our dining room light fixture.

 Little Guy is not always in a "crafty mood", but I got him to make quite a few coffee filter butterflies. He colored the coffee filters with markers and then "painted" over them with a wet sponge so that the colors would blend together. I used pipe cleaners to make them into butterflies. The paper the kids made was used to make the little hearts, and the flower/circle things are made with coffee filters and tissue paper. I got the idea from Pam Garrison's Blog. She has made the most wonderful garland using coffee filters, but I just didn't have time for that.
Art Gallery
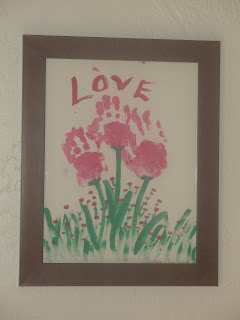
Each season I try to have each of our 3 kids make something for our art gallery. I had thought that February would be a great time to use pinks, reds...and love. Well of course Baby didn't argue and Big Sis was in agreement but Little Guy said he didn't like pink or love. He agreed to use "tractor color" (green), and red. He even used his tractor to make the green part of the painting, by driving it in the paint and then on his paper.

Big Sis painted a heart using dabs of different paint colors. I think it looks like the heart is made of rose petals. And of course Baby made hand print flowers.
I think I will leave these up for another month or two.
Have a delightful day!!
Monday, February 2, 2009
Paper for Valentines
Slowly but surely I'm getting back into blogging. Last week I got back to my other blog Fancy That . This week I hope to get back into the swing of things with this blog.
Decorated Paper

Big Sis and Little guy both had fun with this project. We took tissue paper scraps, scrapbook paper scraps and glued them down to a large piece of construction paper.


The paper will be used to make Valentine Decorations for the house. We are also going to bubble wrap paint, and perhaps marble paint other paper so that we have a variety of textures and techniques. Stay tuned for more decorated paper and the Valentine decorations we make with them.
Have A Delightful Day !!
Sunday, December 14, 2008
Christmas Angel
December is just rushing by. With Christmas programs, Christmas shopping, stomach flue...I just haven't had time to post. But we are enjoying the season, and squeezing in as many crafts as we can.
I made this little angel with the baby. I brushed paint on the bottom of her foot and helped make a foot print on the paper (which is the body of the angel), I then brushed paint on her hands and made prints for the angel wings. I drew the face and other embellishments with a metallic marker. I added a verse and placed the picture in a frame to be part of our Christmas art wall.
Little Guy and Big Sis have art to share too. I hope to get it up soon.
Have a delightful day!!
Thursday, December 4, 2008
The Legend Of The Candy Cane
I love Christmas and reading all kinds of Christmas Stories. We read my childhood copy of The Night Before Christmas, and we share fun new stories like The Auntie Clause , and many others that I hope to share in the weeks to come. But The Legend Of The Candy Cane is up at the top of my list of must read Christmas stories.![]() I read this book to my children last night. My oldest has heard this story many times before, but always looks forward to hearing it again. My 3 year old had never heard the story before, and while there are parts of the story that are perhaps a bit old for him (but maybe not), we focused on the parts of the story that he could relate to. Like the candy cane looks like the letter J (for Jesus), but if you turn it over it looks like a shepherds staff (who were the first to see the New Born Babe).
I read this book to my children last night. My oldest has heard this story many times before, but always looks forward to hearing it again. My 3 year old had never heard the story before, and while there are parts of the story that are perhaps a bit old for him (but maybe not), we focused on the parts of the story that he could relate to. Like the candy cane looks like the letter J (for Jesus), but if you turn it over it looks like a shepherds staff (who were the first to see the New Born Babe).

 If you don't have a copy of this book and can't find one to use, you can find a text only version at The Legend Of The Candy Cane . This is not quite the same as the book, but still is a wonderful story to share with your children. I have received candy canes as a small gift with the printed legend attached. We may give them with a poem (found at the link mentioned above).
We have also been reading This Is The Stable . What a simple but wonderful way to tell the Christmas story to very young children. It is simple enough that my Little Guy is able to remember the words and say them along with me.
The thing I find most wonderful about reading these stories is that Big Sis (in the 6th grade and 11 years old) will stop what she's doing and come snuggle with us as I read.
What's a story with out a craft?
As an extension of The Legend Of The Candy Cane. We did some simple marble painting to create fun candy canes of our own.


As an extension of This Is The Stable we made a bundle of Christmas Hay. We used Raffia and red yarn to make our bundle of Christmas Hay.

Little Guy and I will do something special for Big Sis (perhaps hang Christmas Lights in her room) and leave the Christmas Hay. When she comes home from school she will find the lights and the hay. Now it is her turn to do something special for someone else in our house and pass on the Christmas Hay.
Have a delightful day!!
Monday, December 1, 2008
Construction Paper for Big Girls and Chrismas Card Making
My 16 year old niece and Big Sis (my 11 year old daughter) love to make cards. But not just any old cards, fun glittery cards made cute scapbooking paper.

I like to call it construction paper for Big Girls. I'm sure that many of you are scrapbookers or card makers and can relate to the fascination that is scrapbooking paper, I find my self wanting to buy more and more of it (it's almost like wanting to buy new fabric). My mom bought them 2 big stacks of paper to use for making Christmas cards. I can not tell you how happy it made them. It was as if they had died and gone to card makers heaven

These are some of the card my daughter made. It is fun to see how her ideas and creativity change and grow as she practices her craft.
I think the rick rack is a fun addition to this card.

I pulled out all of my Christmas stamps and we borrowed some from Granny too. Some of the lettering is achieved by the use of stickers or rub-ons. I have been trying to encourage them to cut out simple shapes, like the tree below. It's less expensive than using stickers, and just as cute.
 I love the way the girls use double sided tape, and glitter to create glittery boarders and edges.
 Both of the girls have a tendency to be a little wasteful. So I really encourage them to use their scraps. The book marks and gift tags are just a sample of what my daughter came up with.
 This year she will be making all of our Christmas cards, and gift tags. She was so existed about this idea. I think she feels like she is really making a meaningful contribution, and she is!!
Card making supplies are at the top of these Girls' Christmas lists!!
Have a delightful day.
Wednesday, November 26, 2008
Someth'n Corny
As we were learning about the pilgrims these last few weeks, we have been learning that the Indians taught them (the pilgrims) to grow corn.
One of our activities was to pop, pop corn.

After feasting on pop corn, we made corn meal playdough.
Cornmeal Dough (uncooked)
1 1/2 cups white flour
1 1/2 cups cornmeal
1 cup salt
1 cup water about 1/4 C cooking oil
1. Mix all the dry ingredients in a bowl
2. Add water and oil mix into the dry ingredients.
3. Knead until pliable. (This recipe did not call for oil, but was to crumbly without it. I added a little at a time until I was happy with the texture.)


And last but certainly not least!! We made Caramel Corn!!

Add the following ingredients to at least a 4-quart saucepan (the mixture will expand when soda is added so you will want to have a little extra room).
1 C butter
2 C brown sugar
½ C karo syrup (white or dark)
Mix and Boil for 5 minutes
Add
1 t salt
½ t soda
1 t vanilla
Pour the cooked mixture over 4-5 quarts popped corn and mix thoroughly. Pour out on buttered cookie sheet. Bake at 250 fro 45 minutes stir occasionally. Store in an airtight container.
Have a delightful day and a wonderful Thanksgiving!
Subscribe to:
Posts (Atom)